Add some global flair with these garden accessories.
craft and photography by Sarah Heeringa
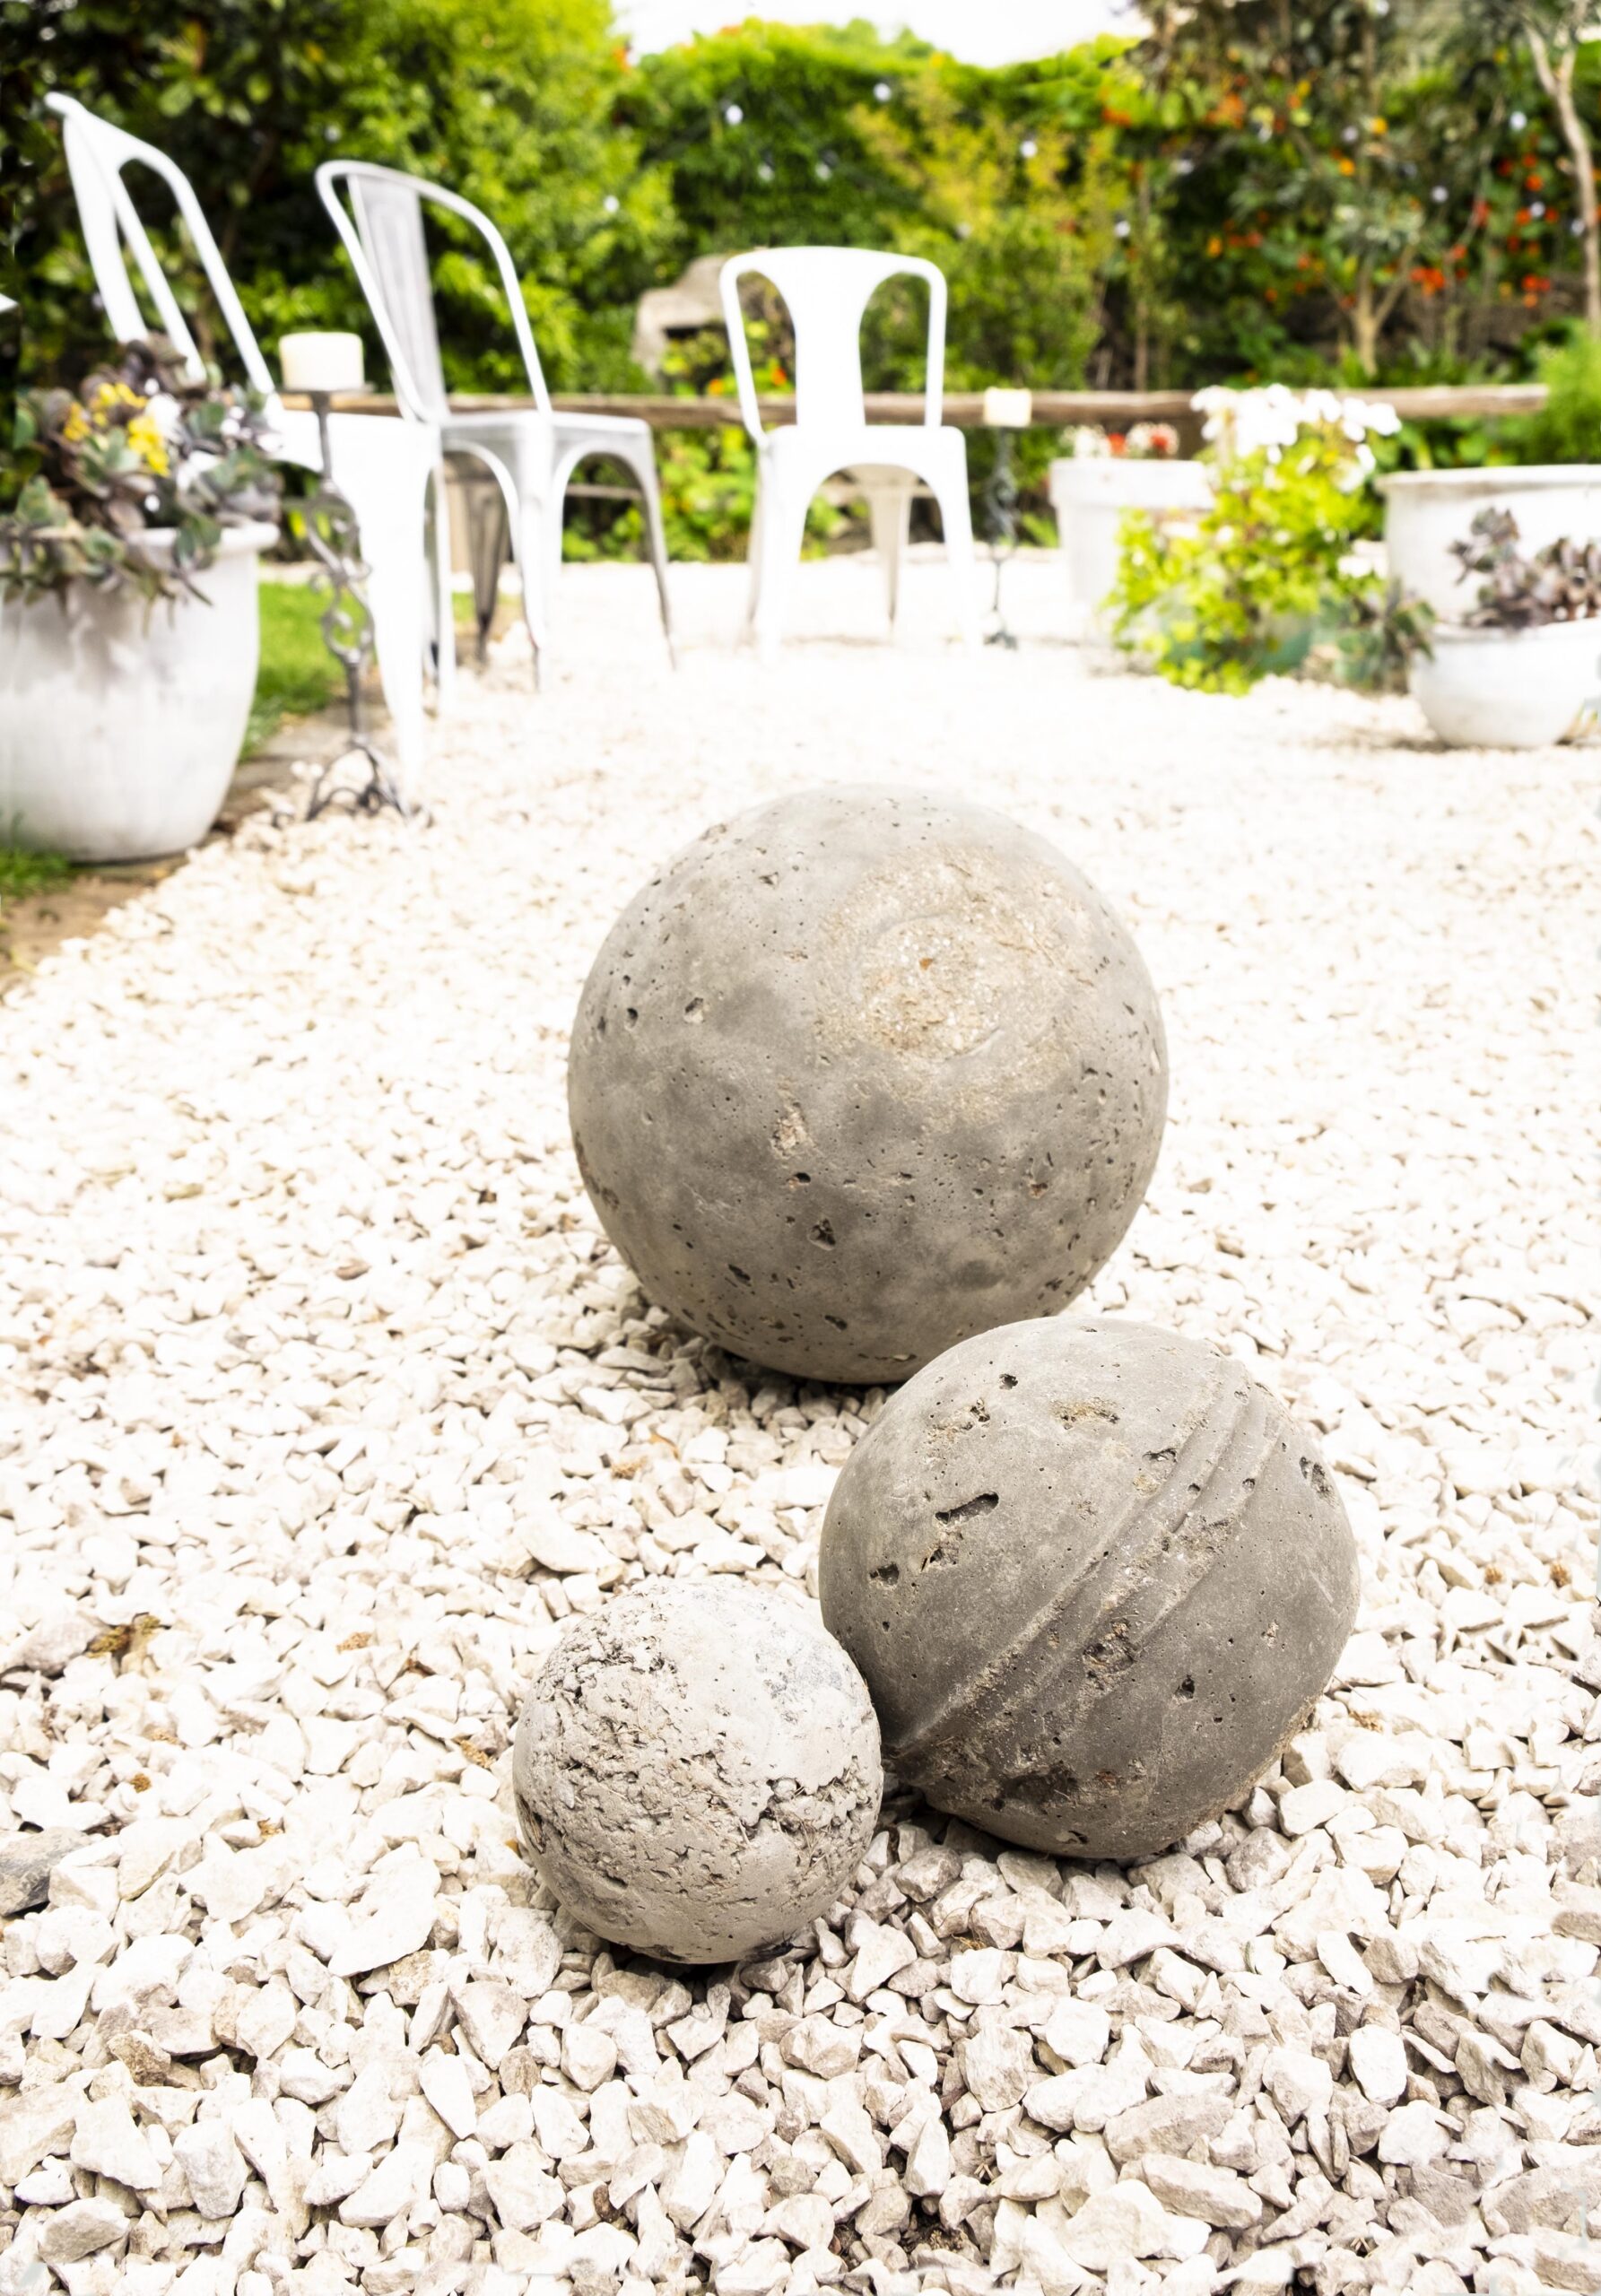
Concrete garden globes are easy to make using various upcycled glass items, such as moulds, and a concrete mix as the filler.
There is lots of scope for experimentation. You can use a bag of pre-mixed concrete for a smooth finish, or try the hypertufa recipe below for a lighter and more organic effect.
I use coconut fibre in my hypertufa mix as it is a more sustainable option than peat moss. I also like to push polystyrene (ex packaging) into the middle of the balls, as it makes the balls lighter, uses less cement mix and saves polystyrene from going into landfill. You can adjust the quantity of hypertufa mix you make according to the size and number of globes you are filling.
Once your spheres have been created you can leave them in the garden to weather naturally, or paint them with a mix of natural yoghurt and moss to encourage a mossy effect.
You will need
Concrete hypertufa mix
- 1 part coconut fibre, separated into flakes
- 1 part course sand or fine pumice
- 2 parts cement powder (Portland)
- water
- polystyrene chunks (optional)
Globe moulds
- Old round glass lamp shades
- Large Edison
- light bulbs
Other materials
- Sacks or old
- drop cloth
- Bucket
- Small trowel
- Safety goggles
- Dust mask
- Gloves
- Heavy-duty plastic bag
- Hammer
- Metal file or wire brush
Step by step
Step 1: Remove any metal fittings from the light shades and carefully pull out the insides of any light bulbs.

Step 2: Wearing the dust mask put the cement powder into the bucket and gently add the other components on top. Add just enough water to create a mix like a thick cake batter.

Step 3: Use the trowel or gloved hands to fill the glass moulds. Once they are nearly full, break the polystyrene into chunks and push them onto the middle of the globe. Doing this means you use less cement and the finished balls will be lighter. Place them on sacking and leave in a sunny dry place for 1-2 days to cure.

Step 4: One by one, put the globes inside the plastic bag, and wearing gloves and goggles, use the hammer to gently smash up the glass. Carefully brush the ball to remove any last glass shards before removing it from the bag.

Step 5: Use a metal file or wire brush to smooth off any lumps

Expert tips
- If your light shades or bulbs have a neck, don’t fill it right up – you want the final shape to be as round as possible.
- Choose moulds in a range of different sizes for best visual interest and balance.